I had posted a while ago when I updated my Project 52 status that I was working on sewing a few cloth diapers. Well the mega obsession continues. I had bought some cheapie 'somewhat waterproof' material to practice on until we found out the sex. Now that we know it's a boy, I'm able to buy cute prints!!!!
I might need to do a little explaining here, or my terminology will just confuse everyone. Cloth diapers have come a LONG way from the flats and pins of the olden days. There are so many KINDS of diapers out there now, prefolds & covers (the old fashion style of flats and a waterproof cover), fitteds, AIO, AI2, pockets, and even ones I haven't cared to dive into: wool, contours, hybrids....
So let me break it down.
Prefolds are the flat cloths that get wrapped around baby, they can be pinned, but now they make these cool things called snappi's


Fitteds are kinda like prefolds in that they need a cover because they are not waterproof and are just the soaker fabric, but they have built in elastic and sometimes snaps to hold themselves onto the baby
Covers are just what they say, water proof covers for the above two.
AIO (All In One) is really just like a sposie (disposable) it has the soaker part built in and has velcro or snaps to fasten it to the baby. The downside to AIOs is that they take a while to dry since they are all built into one diaper.
AI2 (All In Two) is much like the AIO but the soaker inside part just sits in the outer shell so that it can dry faster. Sometimes the soaker pads snap in and sometimes they are sewn in but are loose so they dry faster.
Pockets are a more popular kind these days. It has the shell and inner lining (the part that touches the baby's bum - usually a stay dry fabric) then there is a pocket where you can stuff the soaker pads, so they do not actually 'attach' to the diaper, more so just fit in the pocket - hence the name :-)
Another term:
OS stands for One-Size, meaning the diaper isn't a size (small, medium, large) instead it has adjustable snaps to make it a 'one size fits most' kinda diaper.
WetBag is like a diaper bag, but the inside is water proof and you just throw it in the wash with your diapers.
Since I'm sewing some I have a little more vocab for you!
PUL is the polyester outer shell that stands for Poly Urethane Laminate. It's polyester that has a waterproof laminate on the back. If cotton was used it'd attract moisture and there for most likely leak.
Aplix & Touch Tape are two brands of velcro, just better than velcro because they are softer and withstand the multiple washings. Aplix I heard is good for newborn diapers is softer and Touch Tape is a little stronger and better for toddler diapers.
FOE or fold over elastic is mainly used in making covers, which I just got in the mail yesterday so I haven't had a chance to make my newborn cover.
So here is MY stash thus far:
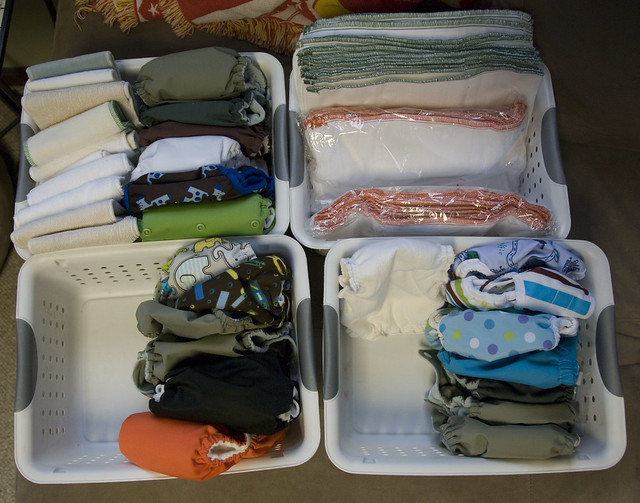
starting with the right side (sorry I didn't think about this when I took the picture). Top I have the prefolds or flats. They haven't been washed yet so they look a little flat and thin. They have to get washed 4-6 times before use which will cause them to fluff up and shrink down. In the bottom right bin I have my newborn covers and newborn AIOs, with one fitted there to the left of the bin that I was practicing my serging skills on before I made one with the PUL fabric. I am doing the prefolds for newborn because it's the easiest, as you can reuse the cover after many changes and just toss the prefold into the wetbag, since that's pretty much all he'll be doing those first weeks, pee and poop, poop and pee, repeat!
On the left side I have pockets and AI2s. The bottom left are the sized pockets, mainly mediums. Since I'm doing newborn and some of my covers run a little big, I will probably be able to skip the size small diapers. On the top left are all OS (one-size) pockets and AI2s so technically I should be able to use these for newborns through potty training, but they run way big on newborns. You might notice the white cloths to the left of the top left bin, these are just my soaker stuffers for the pockets, or AI2s and some have snaps on them, but you can use them in either.
So with my sewing addiction I made a lot of DIFFERENT diapers. There are a lot of free patterns out there and I wanted to make quite a few to find which ones I like sewing best. Then when baby gets here, I'll figure out which ones I like using best. Same with the diapers I purchased. I didn't get any of the same brand as I'm not sure if I'll like that particular brand or not. I got one of each of the following brands: Fuzzi Bunz, Happy Heinies, Bum Genious 4.0, Rumparooz, Best Bottom, Bummis covers (3 different sub brands), Thirsty Due Cover, and one more I can't remember the name of.
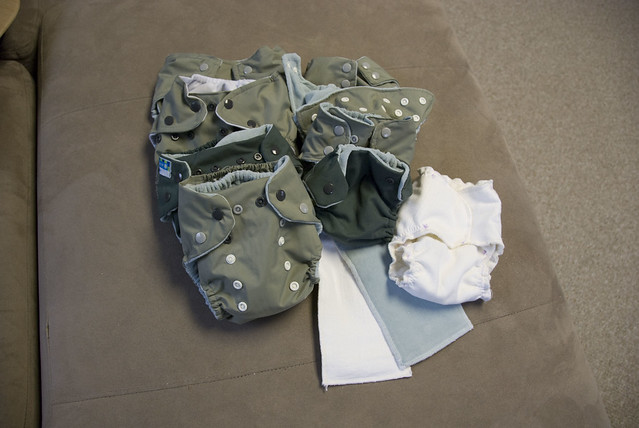
Here is the practice stash I made. Who knows if this fabric (which I think is part gortex) will hold up in multiple washings or not. But I made them with that in mind so I'm okay if they are crap, they were my practice ones.
Then Monday I made these two with my new PUL fabric! Aren't they cute!!!!
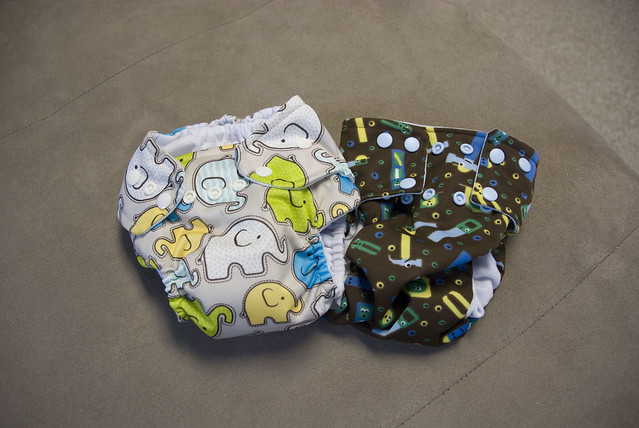
I have extra of the tool fabric to make two more diapers and one newborn cover! The elephant print was only enough fabric for one diaper. Both of these above are pocket diapers size mediums. One has an elastic casing and one was made with the elastic rolling in.
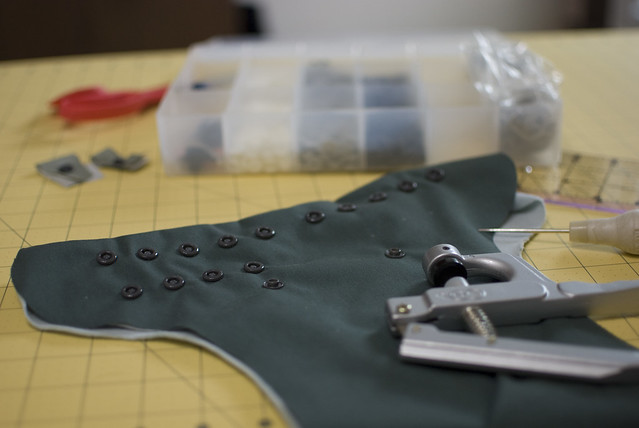
I purchased snap pliers and snaps on ebay from KAMsnaps.com I choose to go the snap route for my pockets because I had read that when babies get older they get the hang of unhooking the velcro and also the velcro can get worn out faster through all the washings. I will use the Aplix velcro on my newborn covers though, just because you can get a better fit.
As you can tell this blog is the result of about 3 months of research :-P Kyle no longer wants to hear me talk about diapers so I have resorted to blogging, hahaha, now you have to hear about it. No, no, just kidding, I wanted to get this post in.
OH I ALMOST FORGOT!!! In the process of me practicing my sergering skills (Mom let me take her serger when we were down there in June) I've made lots of cloth wipes. This was my project today and actually what prompted this whole post to begin with, heehee.
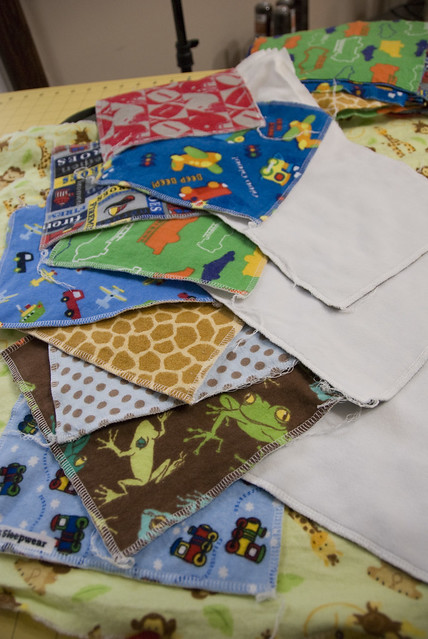
I must say cloth wipes are so much fun!!! It doesn't matter if I use cotton and lets be honest there is a LOT of cute cotton fabric out there! These wipes are two sided. The fun side you see if flannel, the white side is soft velour. The good thing about wipes is if you're washing the diapers might as well just use cloth wipes as you just throw them right in your wet bag. And they can also be used for much more than wiping bums, washcloths, nose rags, umm probably more that I can't really think of right now. I had so much fun buying all these cute boy patterns of flannel! My wipes are 8x8 so all I needed to buy was a quarter of a yard and I got five wipes out of that for only about $.80! Not counting the velour, which I bought with the intention of using as the inner layer of the pockets, but after learning that it is not as stay dry as suede cloth I have decided to only do my inners with suede cloth (I also learned that poo doesn't stick to suede cloth) and read that velour makes great cloth wipes, which is another reason I made lots of them.
Here is a helpful list of fabrics for outside, inside, and soakers (the things that go inside pockets)
Fabrics ok to use on outside: PUL, blizzard/no pill/antipill fleece/premium fleece are waterproof for AIO, AI2, and pocket diapers. Fitted diapers require a cover and can be made of any cotton or flannel.Fabrics ok to go on baby’s butt: buttersuede, alova, bamboo fleece, flannel, cotton velour, microfleece (very thin), suedecloth, flannel, knit, cotton interlock, sport meshFabrics for inserts/nappies/soakers: hemp, bamboo cotton, mircofiber towel, sherpa, velour, zorb (must be sandwiched between two other fabrics), obf, bamboo velour and microfleece
That list was a GREAT place for me to start, but with more research and reading forums I think I found my own preference. I do want to figure out the waterproofness of the fleece, I don't quite get how that will be waterproof. That's my next task on the 'to research' list.
Here is a good chart for HOW MANY cloth diapers are needed at various age groups:
I couldn't get the chart to load, so I'll just type it out.
These amounts are for
washing every 2 days (less if you do everyday, more if you wash every 3)
Up to 6 months: 20-24
6-12 months: 16-20
12-24 months: 12-16
Potty learning: 4-8
Here are some of the resources I have used:
- I think my favorite place to purchase diapers is http://www.nickisdiapers.com/
- And my favorite place to purchase PUL print fabric (which is hard to come by!) is http://kidsinthegarden.com/shop/
- My support and Q&A's has come from the Baby Center community board: Cloth Diapering and Cloth Diapering Sewing 101
- I have also had great input from my friend who is currently cloth diapering and my sister-in-law who cloth diapered some as well.
- I did just learn that http://www.greenmountaindiapers.com/ has amazingly fast shipping!!! I got a dozen of my newborn prefolds and one cover from there. Although I like nickis diapers better, I was impressed that when ordered from both on the same day, my greenmountain order came a few days before the nickis diaper order.
- Last but not least GOOGLE! my go to for questions :-)

