It's been a while since I've blogged, I'm sorry for my absence. I have been keeping up with my weekly project and will get those posted eventually.
But I figured I could still take a minute to type blog even if I don't have any pictures to share... right?
I might have mentioned a while ago that I transferred job positions at the start of the new year. I am now at the main hospital downtown. Well we got a gal hired for the clinic I was working out previously. She started the middle of March, and I've been going out to Maple Grove to train her in. this has create a very, VERY chaotic work schedule! She is only out there a few days a week, every Wednesday, which just so happens to be my scheduled workday downtown. Instead of working in Maple Grove from 8am to 4:30 pm then heading downtown to finish up my 3-11:30 shift, I have just switched out days with my co-worker, added additional days to my week.
My typical work schedule goes like this (all shifts 3pm-11:30pm) every Wednesday and Thursday, then everyOTHER Fri, Sat, & Sun. When I began to train the new gal, I worked Tuesday evening, then went to MG on Wednesday for the day shift, then finished out my weekend with my Thur, Fri, Sat, Sun evening shifts. THEN Monday I had to be back out to Maple Grove at 8am. Yup that was a rough 7 day stretch of working everyday. Then I had Tuesday off, worked at Maple Grove Wednesday during the day, then my evening shift shifted over one day so I did that Thur & Fri evening. Then I got two days off WOO HOO! Which brings us to today, I'm working the evening shift today (which is a Monday, normally one of my days off) but since I'm back at MG on Wednesday I traded the Monday shift. Then I'll finish off my weekend on with Thur, Fri, Sat, Sun evening.
Whew, did you stay with all that? Yeah I know it's rather confusing. But that's been my BUSY life lately, and the reason for my absence from the blog.
But I do have an update to share from this weekend. We ordered the remainder 5 windows!! Which are to be installed early May. So that will finish our exterior windows/doors project!!!!! We had three windows on the main level to replace and then two upstairs in our bedroom.
Of course I'll give the before and after update once they get installed.
Really that's about all we've been up to, just catching up on sleep and trying to spend some good time together when we can.

Monday, March 28, 2011
Tuesday, March 8, 2011
Bottling our Beer
Well three weeks have passed since we brewed our first batch of beer. We had planned on bottling last weekend, but that didn't end up happening.
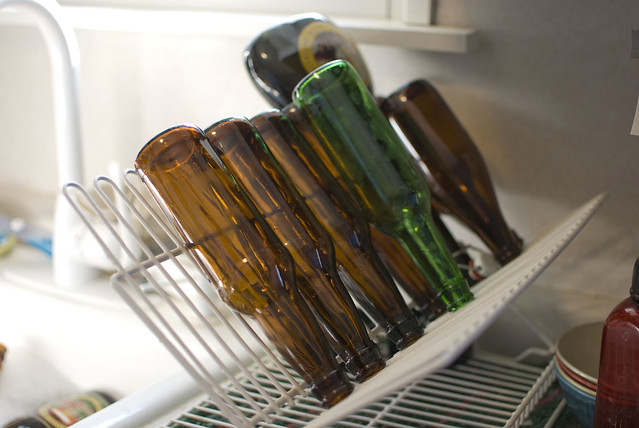
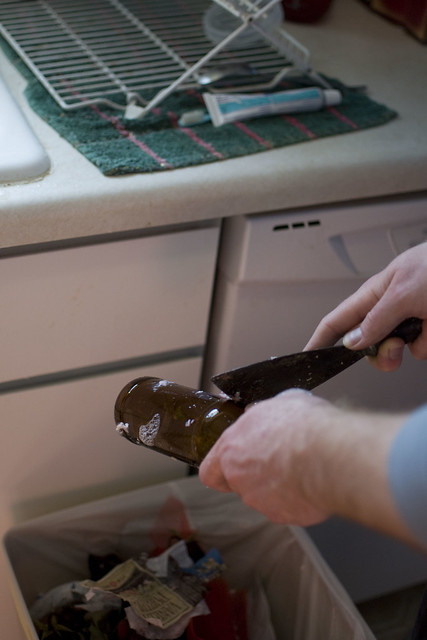

First, we've been collecting bottles for quite some time. And already cleaned and peeled labels off one batch. But it was time to do the rest of the ones we've accumulated (this was Saturday before I went to work).
This was a pain. But we found it easiest, once they've soaked for a bit, if Kyle used a putty knife to scrap off the labels, then after dropping them back in the water, I went over them with a little scrub brush to get any remainder pieces of paper and/or glue.
Then of course I had fun taking pictures of them while they dried.
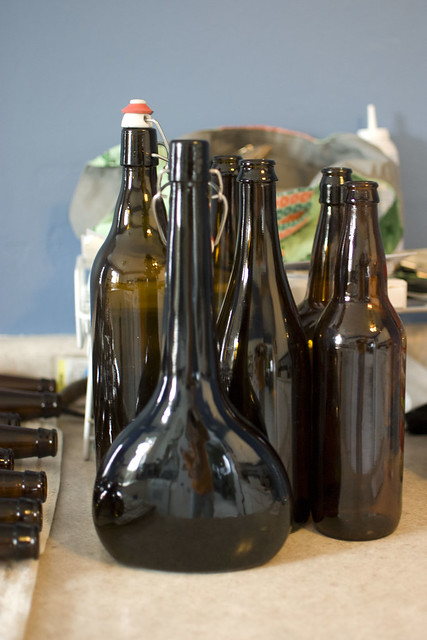
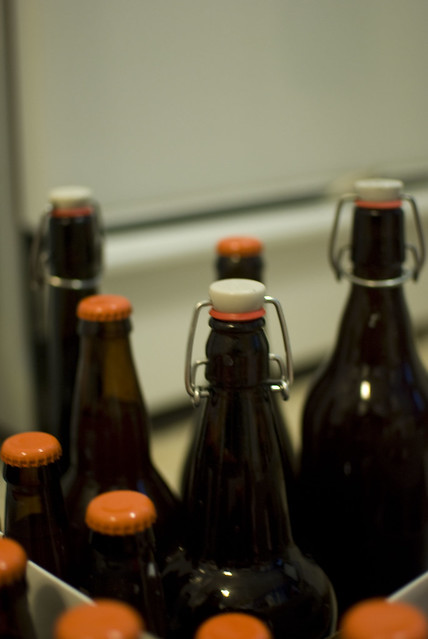
We had also began to purchase bigger bottles with the EZTops, just for the purpose of bottling. I mean why purchase empty bottles, when you could just buy them full of beer then re-use them :-)
Remember the beginning of the Laverne & Shirley show, yeah I felt like I was working in a bottle factory :-P
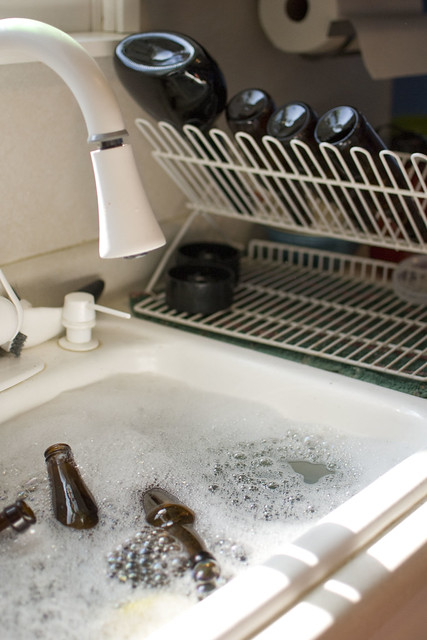
Alright once all our bottles were cleaned and ready it was time to SANITIZE! In case you weren't aware, there is a LOT of sanitizing in the beer brewing process. Gotta keep all that bacteria out, heaven for bid the tiniest bit ruin 5 gallons of beer and basically weeks of work. (okay more like hours spread out over weeks, lol).
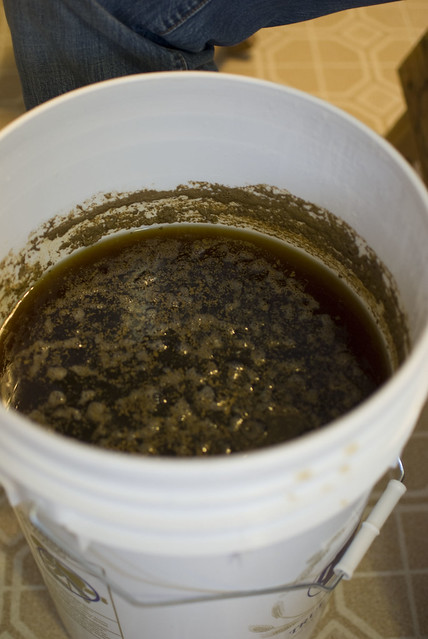
Next comes the VIP... the bucket of fermenting beer. Well it stopped fermenting a while ago, but it hasn't been disturbed in 3 weeks. Ewww look at that sludge.
But aaaah look at that copper beer under all that sludge, lol.
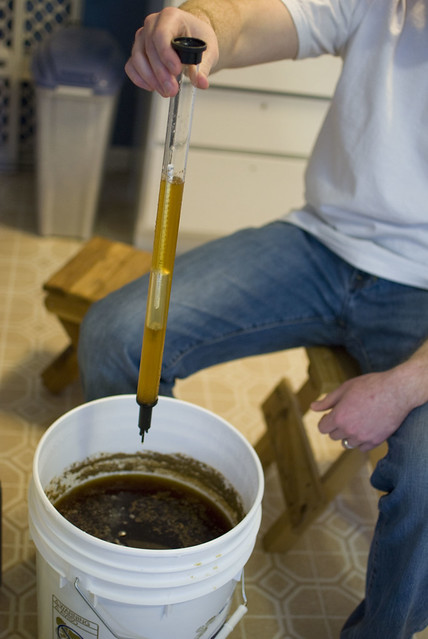
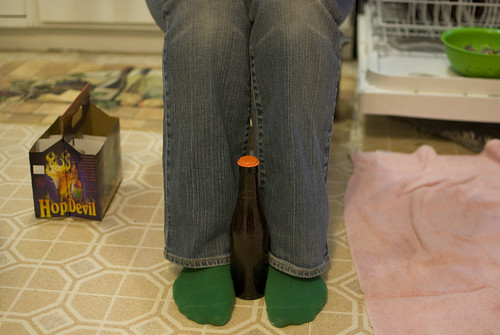
First step, getting a hydrometer reading. And testing the alcohol %. It looked right on target so were were good to go. Although it's not like we were going to do anything else, we were already determined to bottle today!
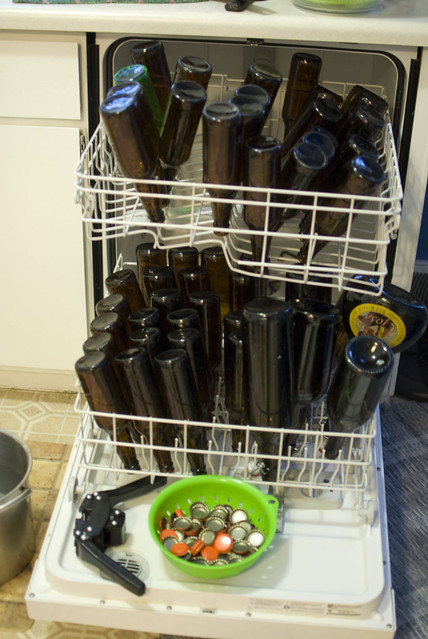
Okay a little back story about now. So way back when, last summer when we purchased the 'Starter brew kit' from Beer and Wine Hobby with a Groupon (oh and if you haven't signed up for Groupon yet, you GOTTA check it out. Here use my referral code if you sign up! http://www.groupon.com/r/uu778896 ) we got a 'few' of the starting supplies we needed, but of course there was much more to help this process go smoother. SO we've made many trips down the road to the wonderful world of Midwest Supplies. Point of this story.... Friday Kyle went by to get an autosiphon, thief, & some rinse-free sanitizer. We had already purchased: a thermometer, 5 gal steel pot, ingredient kit, & strainer a few weeks ago for the brew process. Well Saturday during our bottle preparation, we sat down and watched this DVD that was given to us by midwest last summer. It was a step-by-step guide to brewing. Of course we didn't watch it BEFORE we brewed, because well we had friends there that guided us :-) We did learn some other little tid-bits in the video and learned about bottling. So a list was made for a few more items that needed to get picked up from Midwest before this event actually took place. So SUNDAY we made another trip to pick up a bottling tube (mini-thief), another bucket (I'll get into that story in a second), and some extra caps - although our kit came with some caps and a capper, we wanted to have back up in-case we messed some up. And it was fun to get a fun color of cap. We also wanted to pick up a bottle tree, which helps with the drying process, but they were out of the size we needed, luckily the cashier suggested using the dishwasher, which you can actually run a cycle (without soap) and that will sanitize them, but we just sanitized them ourselves and used the racks to dry them.
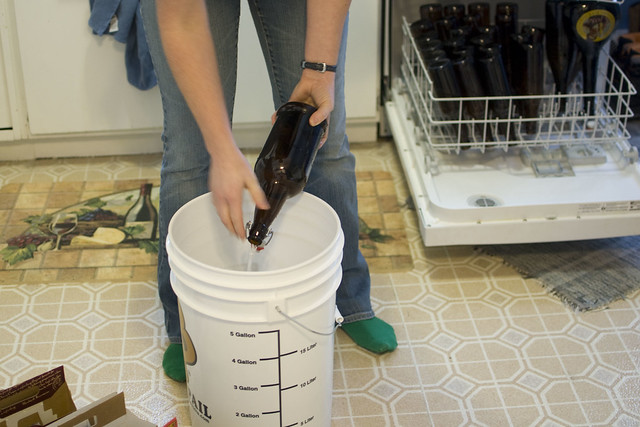
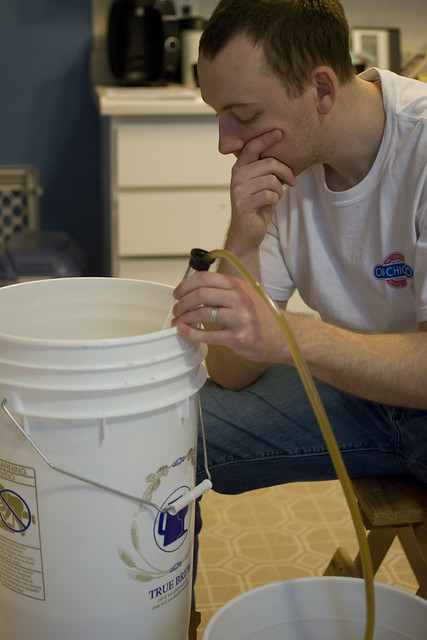
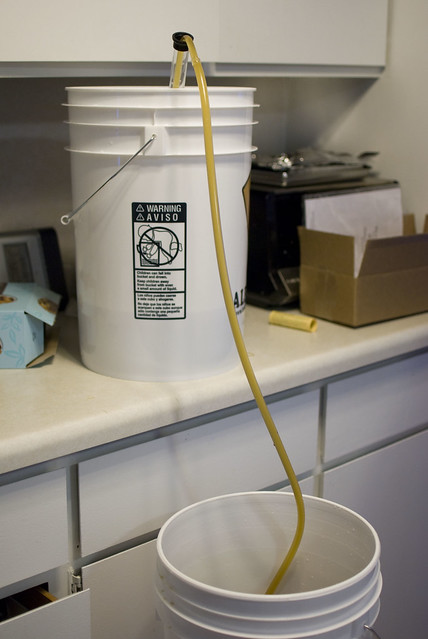
Okay so, why did we get a 2nd bucket you ask?? Well during the video we learned that you can either 1) place your hops directly in the boiling beer like we did or 2) place the hops in a nylon bag, much like we did the grains. Either way is fine, either way works, it's basically personal preference. Well after learning this, Kyle is dead set on using the nylon bag next time, because (hopefully) this helps avoid all the sludge that comes into play. Ya you saw it in our earlier post. Well we knew there was some unwanted sludge in the fermenting bucket and the yeast creates extra sludge during fermentation. Sometimes they recommend fermenting twice and then transferring to a 'bottling bucket' but we didn't need to ferment twice. We DID however have our beer in a bottling bucket (basically means it's just a bucket with a spigot at the bottom). In order to bottle and create that carbonation, you have to add sugar, then seal the bottles. Then while they sit for a few weeks they begin to carbonate. We did test the beer, and it was good! Just flat. Often times people will transfer from a fermenting bucket to a bottling bucket and add the sugar mid transfer (so the sugar can get good and mixed up) well we didn't want to buy a second bottling bucket since we already had one. And it would be good to have a non-spigot-ed bucket for fermenting next time (peace of mind, I was paranoid the spigot was going to leak during fermentation, luckily it didn't). So we purchased a bucket with the plan to siphon the beer into the new-sanitized-bucket, clean/sanitize the bottling bucket, and siphon back into the bottling bucket while adding the sugar. Yes this was an annoying process, as the siphoning took FOREVER! But we did get rid of the sludge. Let's just hope we didn't add enough oxygen to the beer for it to be bad. Surely it won't.
Okay I think I got out what I wanted to, I felt like I got lost a few times in the midst of that back story, lol. So here we are siphoning (with our NEW auto siphon) the beer from the bucket it was fermenting in (our bottling bucket) you can see all that yeasty sludge! And boy was there a TON on the bottom!
Waiting and waiting....
side note: Yes we were both wearing beer shirts during this process :-D and no we weren't drinking any beer :-( it's Sunday, they don't sell beer in Minnesota on Sunday, something we'll never get used to. Unfortunately Kyle picked up beer for us to have during the bottling process on Friday while I was at work, but the way work was Friday night we ended up drinking them that night, lol. Oh well, pretty soon we'll have PLENTY to drink, haha.
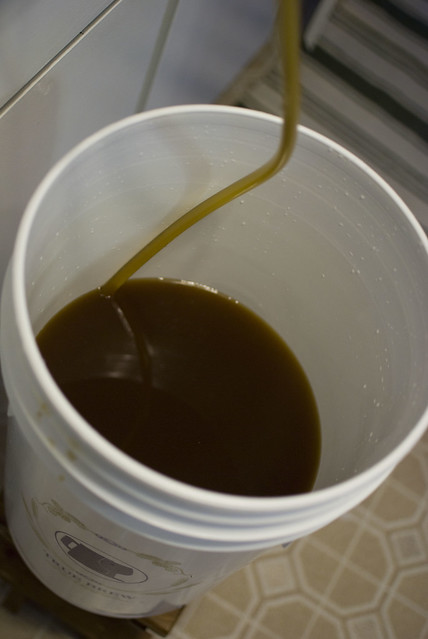
Then we moved onto the second siphon, it helps when you put more gravity in to play :-)
Oh and we added the sugar water in at this point. I didn't get any pictures of that, oops. But look at this beautiful copper, sludge free ale!
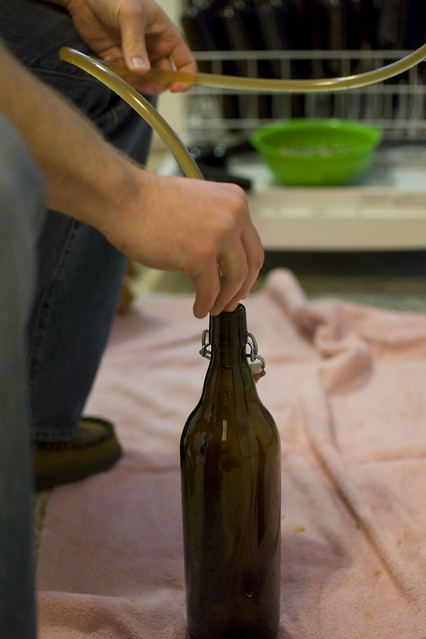
Alright! It's time to bottle!
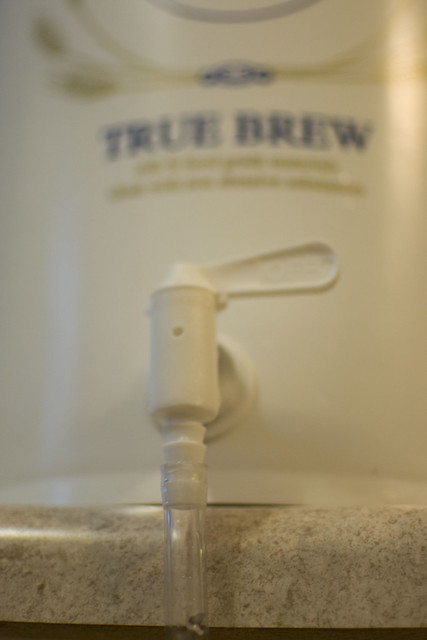
We got the bucket moved over to it's 'bottling spot', attached the hose to the spigot.
and attached our bottler (mini-thief I like to call it) to the other end of the hose
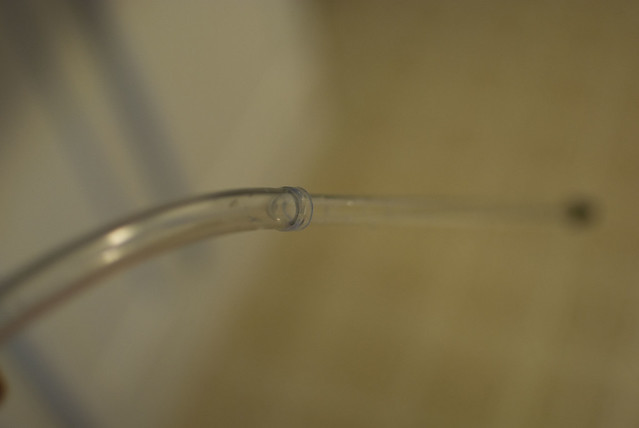
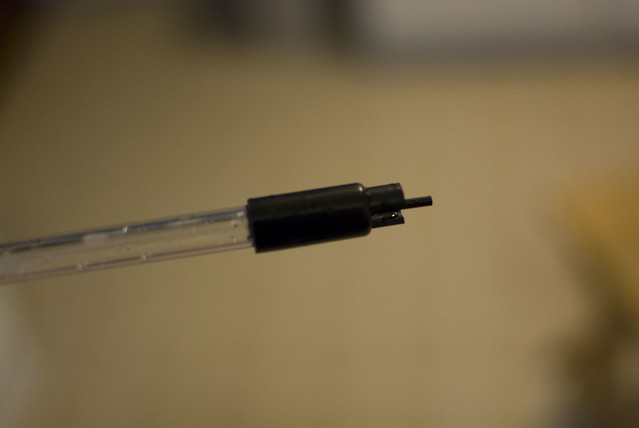
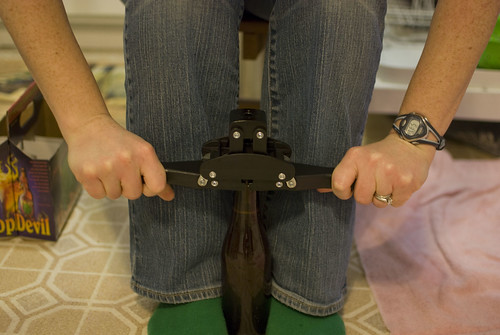
So you may be asking, what IS a thief or bottler thingy? Well here's a picture of the end:
It has this little thing on the bottom and when you hit it on the bottom of the bottle it starts the flow and starts to fill up the bottle. Then as soon as you lift it up, that little thing at the end closes off the opening and stops the flow. Making bottling a MUCH cleaner process. The thief is bigger (and is what we used to take the hydrometer reading), it kinda works the same way, although I don't think you have to hit the bottom. You stick it in the bucket and it fills up in the thief as much as you stick in and then when you lift it up some is trapped in the tube. I think the bottom acts on gravity or pressure as you pull it out or something. Oh maybe the little thing floats in the thief which makes it let the liquid in until you bring it out it closes the opening off.... I dunno exactly, if you have more questions there's always good, :-P They call it the thief because it 'steals' some of the beer, you can just reach this in and take out a sample.
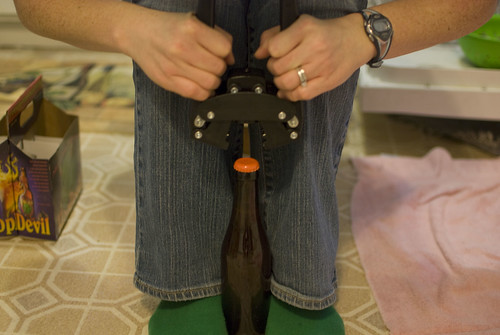
Okay so we were all set. Kyle started filling and I began capping.
After a short while... all the beer was gone and in their designated bottles!
The EZ Cap bottles were just that EASY!!!
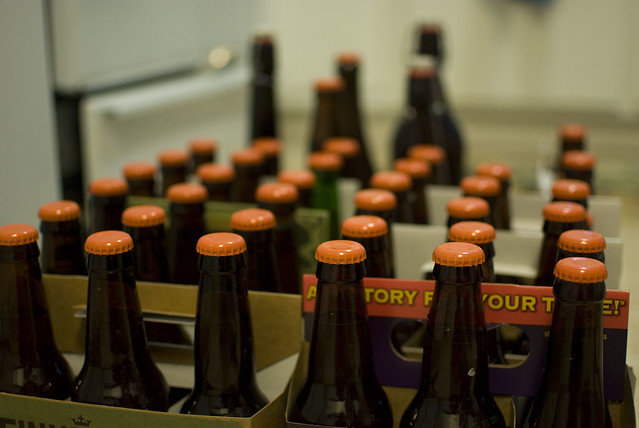
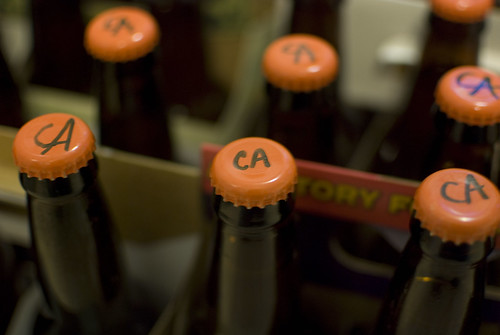
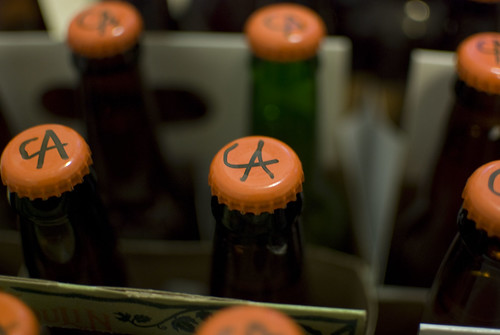
We picked the orange caps because we figured that matched the name of the beer the best "Copper Ale". AND we decided to write on the tops to label it's contents. I started out with a clean print type CA (for copper ale, duh!)
Then after only a few I began to get more creative, lol.
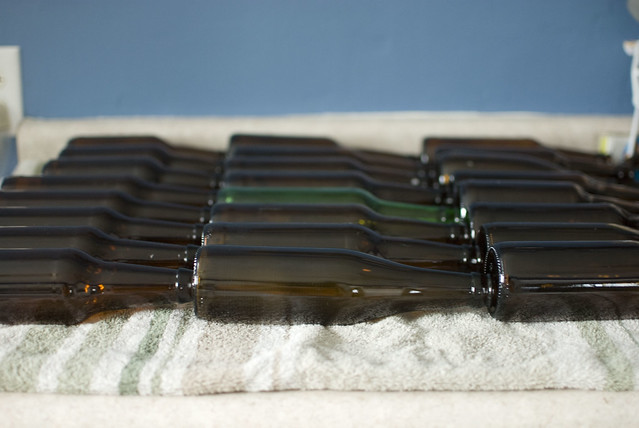
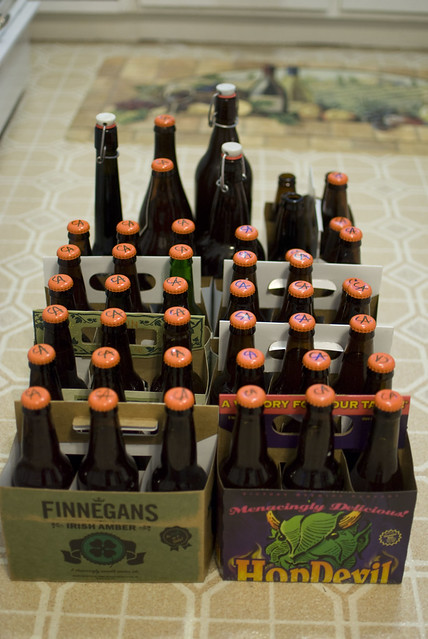
So as you can see we ended up with 38 little bottles (12 oz or 16 oz... I don't remember) and 5 bigger bottles, 1 liter or more.
Monday, March 7, 2011
9/52

Friday, March 4, 2011
7/52 & 8/52
You know you're behind when you're posting two weeks at once :-P
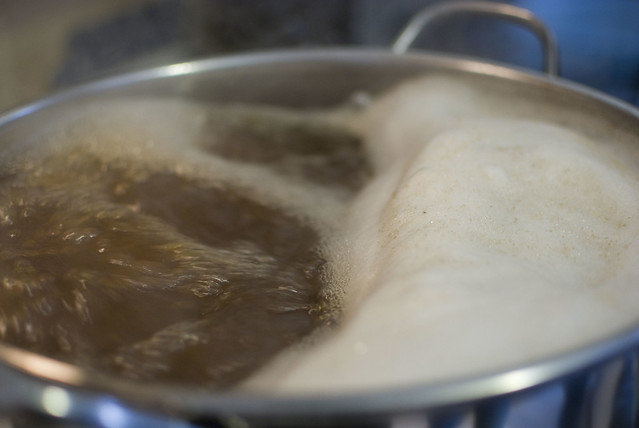

My week 7 photo comes from our beer brewing experience:
It was hard choosing a photo for this week from our beer brewing processes. But I landed on this one. I picked it because it's well the bulk of the process.... brewing! And I love the foam that formed on the top, reminds of me of a beer right out of the tap. Although we did scoop all that foam out, lol.
And my week 8 is from a wonderful newborn session I did
I was honored to be hired by a friend of mine to take her daughter's newborn photos. She was a precious little one, very in-tuned to what was going on, she didn't want to miss her opportunity to shine. I just love this expression!
Subscribe to:
Posts (Atom)